Creating a Microsoft Teams Webinar
- Open Microsoft Teams.
- Select calendar from the left menu.

- Select the Down Arrow next to 'New Meeting', and choose 'Webinar'.

- Fill in the Title and Date information and add a Description.
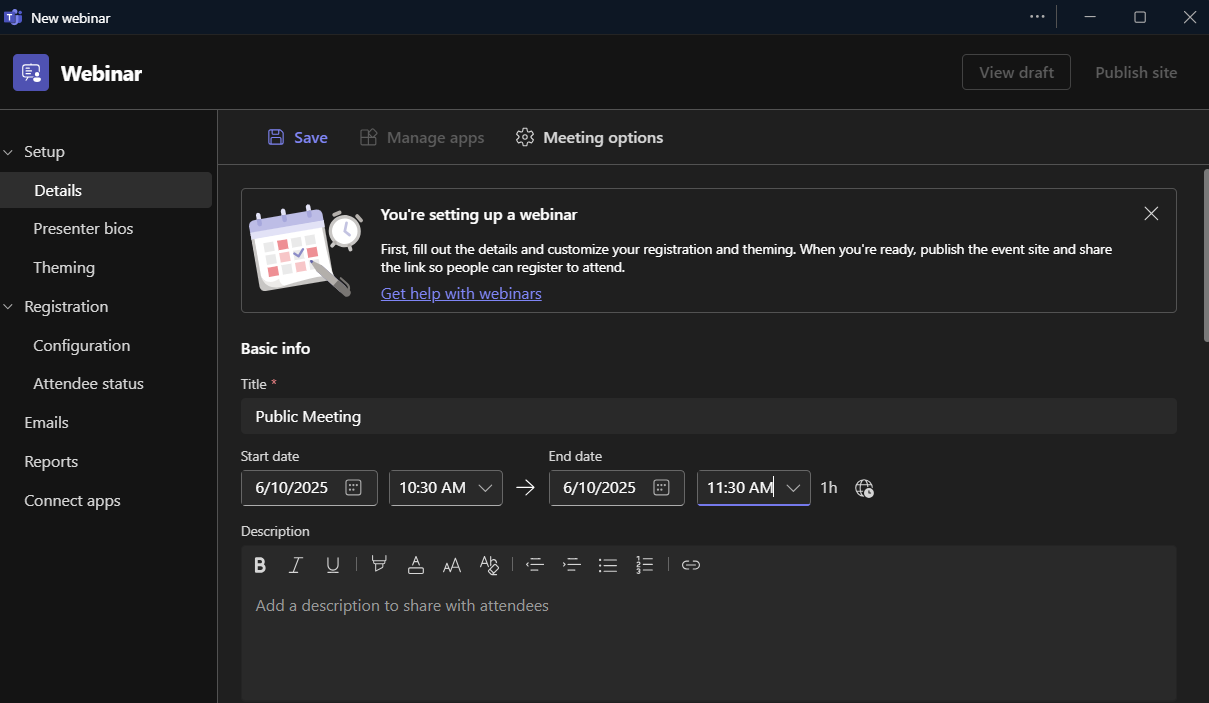
- Scroll down to add the meeting attendees. This would typically include the agency staff that are at the meeting and then any external presenters. NOTE: If this is an in-person meeting, you do not need to add any attendees unless someone is sharing a document or presenting information on a screen. In this instance, the meeting organizer would need to start the webinar and be connected to a camera in the meeting room.

- Co-organizers can manage the event, but cannot publish or edit the event details.
- Presenters present or speak at the event.
- 'Add external presenters' allows you to invite specific people from outside the State of Indiana to be able to present.
- Under Event Access, select ‘Public’ so that anyone on the internet can view the event page and register. Leave ‘Enable attendee emails’ on. This will send a person the meeting link after they register (See steps 12 & 13 for more on registration).

- Choose Meeting Options.

- Select the down arrow for 'Who can bypass the lobby' and choose 'Everyone'.

- Continue scrolling through the Meeting Options and allow ‘Enable Green Room’, and ensure that ‘Allow mic for attendees’ and ‘Allow camera for attendees’ are toggled off.

- Turn off Meeting Chat and you can choose to allow Q&A. If you allow Q&A, ensure that only organizers, co-organizers and presenters can manage Q&A. You may wish to limit this to only Organizers and co-organizers.
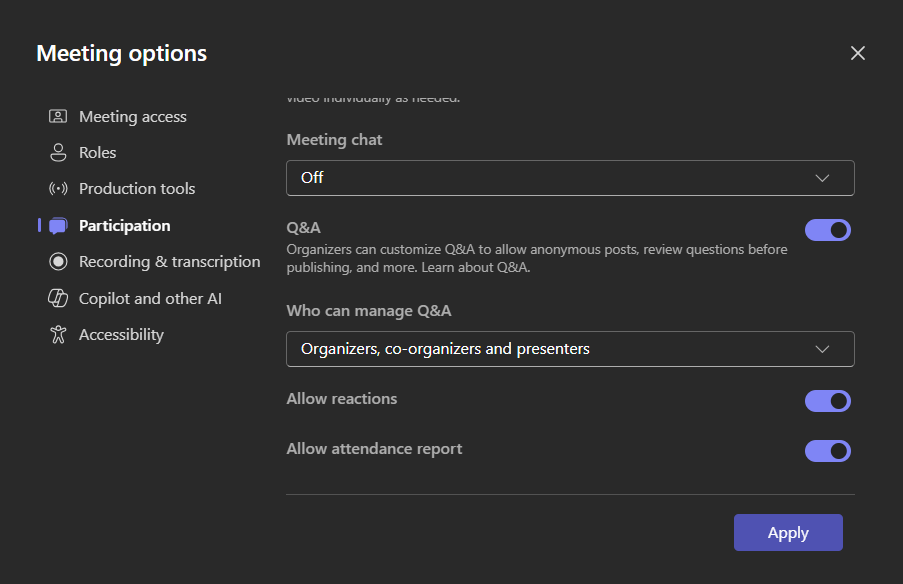
- Allow for the Webinar to be recorded and transcribe. Then select Apply.

- Publish site and capture the link. The link must be posted on the agency website an in the meeting agenda (REGISTRATION REQUIRED). (Alternative instructions in the next step).

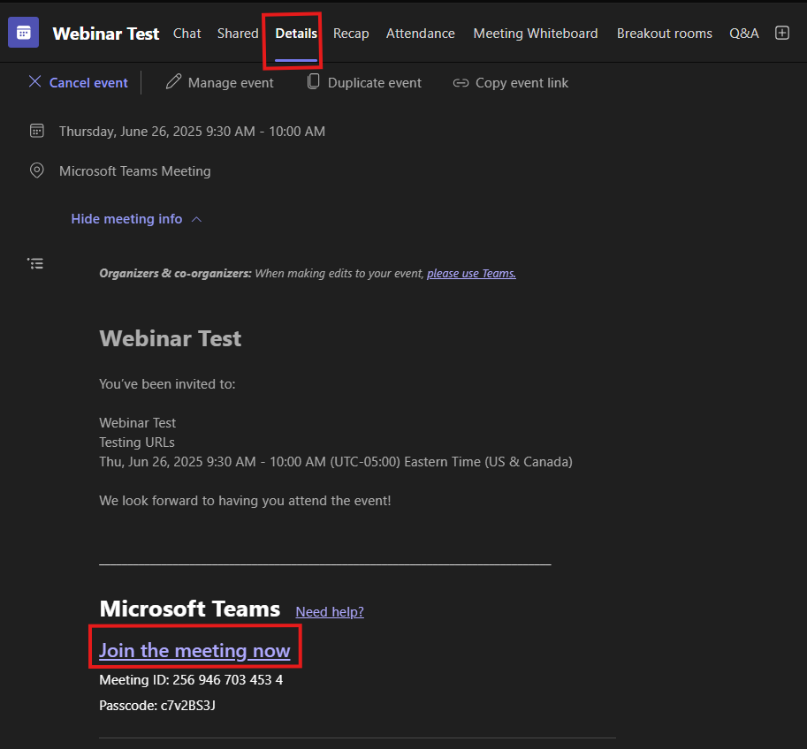
- Go to the Event in your Teams calendar and select your event. Look at the Details tab and choose ‘Join the meeting now’ (NO REGISTRATION REQUIRED IF DONE THIS WAY). Post this to your website.
- In order to attend, people must register from the link from Step 12 or if you use Step 13 no registration is required. Advantages of registration is that Microsoft will automatically after the event ends email a link to the video recording to all registrants.
Day of Event
- Meeting participants (state staff and any external presenters) will use the Join link from Teams or Outlook.

- The Webinar will take you to the 'Green Room' where meeting participants can talk before starting the meeting. When you are ready to begin the Public Meeting, choose 'Start Meeting'.

- Once the meeting is over, click 'End Event'. This will end the transcription and recording. NOTE: Once an Event is ended, it cannot be restarted.

- Meeting participants will be given the option to stay in the Green Room. Meeting attendees (the public) will receive a message that the Event has concluded.
After the Meeting
- Once the meeting concludes, in order to share the recording, you will need to publish it so that all attendees receive a copy.
- The event organizer must open the Webinar from the Teams calendar and select 'Manage event'.

- Select 'Recordings'.

- Publish the Recording.


- Recordings are automatically saved for 30 days. After you publish, click 'Extend for 60 days'. This will make the recording available for 90 days.

- If you have left on 'Enable attendee emails' they will be sent an email with a link to the recording.
- Anyone can view the recording in the future by going to the event page. To get that link, click on View published site. Post that link to the agency webpage, along with the agenda and meeting minutes.
