Hazconnect (formerly Tier II Manager) is an online hazmat reporting and emergency planning system used by the state of Indiana to collect and process annual Tier II reports from facilities (often referred to as EPCRA Section 312 reports).
Refer to the tutorials below and the Frequently Asked Questions section on the Hazconnect page for help before contacting IDHS for support.
Step-by-Step Tutorials
- How to Find Your Username
- Go to https://tier2.dhs.in.gov/Account/Login.aspx. Select the blue Forgot Username?
 link on the right side of the screen.
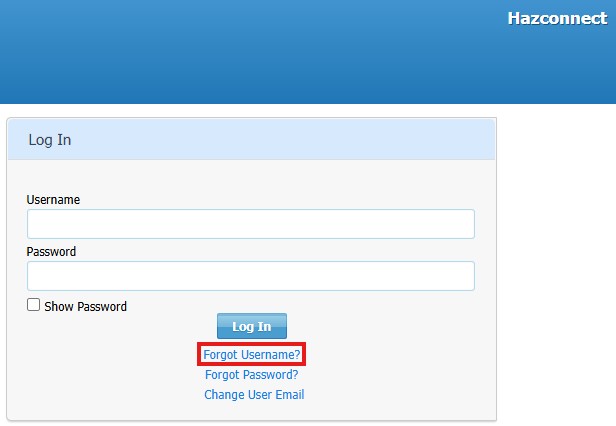
- Enter your information in the Forgot Your Username section. Make sure to fill out all the boxes that have a red asterisk. When finished, select the blue Request
 button.
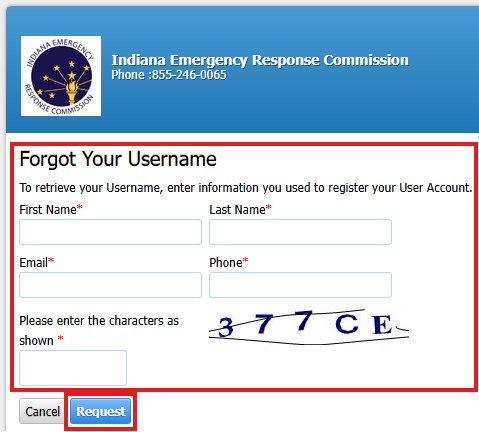
- A pop-up will appear on the screen. Select the Ok
 button.
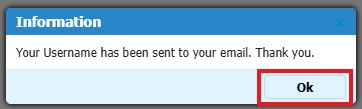
- Check your email. You will receive an automated email from the system with your username.

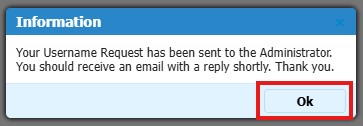
- If you have multiple usernames, then your pop-up will tell you that a Username Request has been sent to the Administrator (IDHS). You should receive an email with a reply shortly.
- Go to https://tier2.dhs.in.gov/Account/Login.aspx. Select the blue Forgot Username?
- How to Reset Your Password
- Go to https://tier2.dhs.in.gov/Account/Login.aspx. Select the blue Forgot Password?
 link on the right side of the screen.
- Enter your information in the Forgot Your Password section. Make sure to fill out all the boxes that have a red asterisk. When finished, select the blue Request button.

- Enter your information in the Forgot Your Password section. Make sure to fill out all the boxes that have a red asterisk. When finished, select the blue Save
 button.
- A pop-up will appear on the screen. Type in your new password. When finished, select the blue Save button.

- If you enter a password you have used before, you will receive an error message stating Password entered cannot be the same as the last 5 passwords entered. Enter your information in the Forgot Your Password section. Make sure to fill out all the boxes that have a red asterisk. When finished, select the blue Save button.

- A pop-up will appear on the screen. Type in your new password. When finished, select the blue Save button.

- A pop-up will appear on the screen. Select the Ok button.

- Check your email. You will receive an automated email from the system notifying you that your password was reset successfully. You can now log in with your new password.

- Go to https://tier2.dhs.in.gov/Account/Login.aspx. Select the blue Forgot Password?
- How to Change Your User Email Address
- Go to https://tier2.dhs.in.gov/Account/Login.aspx. Select the blue Change User Email
 link on the right side of the screen.
- Enter your information in the Change User Email Address section. When finished, select the blue Proceed
 button.
 - Enter your information in the Change User Email Address section. Make sure to fill out all the boxes that have a red asterisk. When finished, select the blue Save button.

- A pop-up will appear on the screen. Select the Ok button.

- Check your email. You will receive an automated email from the system stating the User Email Address has been changed. Select the link in the email to verify your email address.

- A pop-up will appear on the screen. Select the Ok button. You can now log into your account.

- Go to https://tier2.dhs.in.gov/Account/Login.aspx. Select the blue Change User Email
- How to Register for an Account as a Reporting Facility/Business User
- Go to https://tier2.dhs.in.gov/Account/Login.aspx. Select the blue REGISTER
 . button in the middle of the screen.
- Select the drop-down option and choose No
 for “Are you reporting an Incident like a chemical spill?” Then select the blue Next
  button.
- Select the drop-down option and choose Reporting Facility/Business User
 for “What Type of User are you?” Then select the blue Next button.
- Enter your information in the User Account Details. Make sure to fill out all the boxes that have a red asterisk. When finished, select the blue Submit
 button.
- A pop-up will appear on the screen. Select the Ok button.

- Check your email. You will receive an automated email from the system with your account information.

- Check your email again. You will receive another automated email to verify your email address. Select the link.

- A pop-up will appear on the screen. Select the Ok button.

- Your account will appear in the Users Pending Approval section for the Administrator (IDHS) to review. Once the Administrator has reviewed your account, you will receive an automated email from the system stating if it was approved or rejected. You may receive an email from the Administrator asking for more information about your facility.

- Log into your account with your username and password. Select the blue Log In
 button.
- A pop-up will appear on the screen. You will receive an automated email from the system with a One-Time Password (OTP). Check your email and enter your OTP. Select the blue Verify & Proceed
 button. Ensure the checkbox Don’t ask for OTP for the next 90 days
  is marked. If you change devices during this 90-day period, you will have to reverify your account.


- You can then edit your User Account Profile. Select any of the boxes and change the information if needed. When finished, select the blue Save button at the bottom of the screen.

- You will then see a screen that states Welcome to Hazconnect with a paragraph of information regarding the program. YOU ARE NOW LOGGED IN.

- Go to https://tier2.dhs.in.gov/Account/Login.aspx. Select the blue REGISTER
- How to See Your Active Facilities Associated with Your Hazconnect Account
- Go to https://tier2.dhs.in.gov/Account/Login.aspx. Log into your account with your username and password. Select the blue Log In
 button on the right side of the screen.
- You can do 1 of 3 options. Option 1: select the Continue
 button on the right side of the screen.
Option 2: select the blue Active Number
 link under the Facility Status Summary box. You can only select this number if you already have an Active facility. Your number could be higher than 1.
Option 3: hover over the blue Facilities
 tab button and select the blue List Facilities
  button.
- Select the blue Facility Name
 link for the facility you want to look at. Your facility name will be different from the image below.
- The system will take you to your List Submissions page for your facility.

- Go to https://tier2.dhs.in.gov/Account/Login.aspx. Log into your account with your username and password. Select the blue Log In
- How to See Your Inactive Facilities Associated with Your Hazconnect Account
How to See Your Inactive Facilities Associated with Your Hazconnect Account
- Go to https://tier2.dhs.in.gov/Account/Login.aspx. Log into your account with your username and password. Select the blue Log In button on the right side of the screen.
- Select the blue Inactive Number link under the Facility Status Summary box. You can only select this number if you already have an Inactive facility. Your number could be higher than 1.

- Select the blue Facility Name link for the facility you want to look at. Your facility name will be different from the image below.

- The system will take you to your List Submissions page for your facility.

- Go to https://tier2.dhs.in.gov/Account/Login.aspx. Log into your account with your username and password. Select the blue Log In
- How to Make Your Facility Inactive in Hazconnect
- Go to https://tier2.dhs.in.gov/Account/Login.aspx. Log into your account with your username and password. Select the blue Log In button on the right side of the screen.
- You can do 1 of 3 options. Option 1: select the Continue button on the right side of the screen.
Option 2: select the blue Active Number
link under the Facility Status Summary box. You can only select this number if you already have an Active facility. Your number could be higher than 1.Option 3: hover over the blue Facilities
tab button and select the blue List Facilities button.
- Select the blue Facility Name link for the facility you want to look at. Your facility name will be different from the image below.
- The system will take you to your List Submissions page for your facility.

- Select Change Facility Status
 button on the left side of the screen.
- Select the drop-down option for Facility Status
 and change the status from Active to Inactive. Select the Calendar Icon
  button next to the Date
  and choose the date when the facility went Inactive or type it in. Select the drop-down option for Reason
  and choose the appropriate reason for why the facility is going Inactive (i.e., Location Change, Out of Business, and Reporting Exemption). When finished, select the blue Save
  button.
- You should no longer see the Inactive facility under your Active facilities list.

- Go to https://tier2.dhs.in.gov/Account/Login.aspx. Log into your account with your username and password. Select the blue Log In
- How to Make Your Facility Active in Hazconnect
- Go to https://tier2.dhs.in.gov/Account/Login.aspx. Log into your account with your username and password. Select the blue Log In button on the right side of the screen.
- Select the blue Inactive Number link under the Facility Status Summary box. You can only select this number if you already have an Inactive facility. Your number could be higher than 1.
- Select the blue Facility Name link for the facility you want to look at. Your facility name will be different from the image below.

- The system will take you to your List Submissions page for your facility.

- Select Change Facility Status button on the left side of the screen.

- Select the drop-down menu for Facility Status
 and change the status from Inactive to Active. Select the Calendar Icon button next to the Date and choose the date when the facility went Active or type it in. The drop-down option for Reason will automatically change to Active
  . When finished, select the blue Save button.
- You should now see the Active facility under your Active facilities list.

- Go to https://tier2.dhs.in.gov/Account/Login.aspx. Log into your account with your username and password. Select the blue Log In